08. Launch a Redshift Cluster
Launch a Redshift Cluster
WARNING: The cluster that you are about to launch will be live, and you will be charged the standard Amazon Redshift usage fees for the cluster until you delete it. Make sure to delete your cluster each time you're finished working to avoid large, unexpected costs for yourself. Instructions on deleting your cluster are included on the last page in this lesson. You can always launch a new cluster, so don't leave your Redshift cluster running overnight or throughout the week if you don't need to.
- Sign in to the AWS Management Console and open the Amazon Redshift console at https://console.aws.amazon.com/redshift/.

Navigate to a new service
- On the Amazon Redshift Dashboard, choose Create cluster. It will launch the Create cluster wizard.
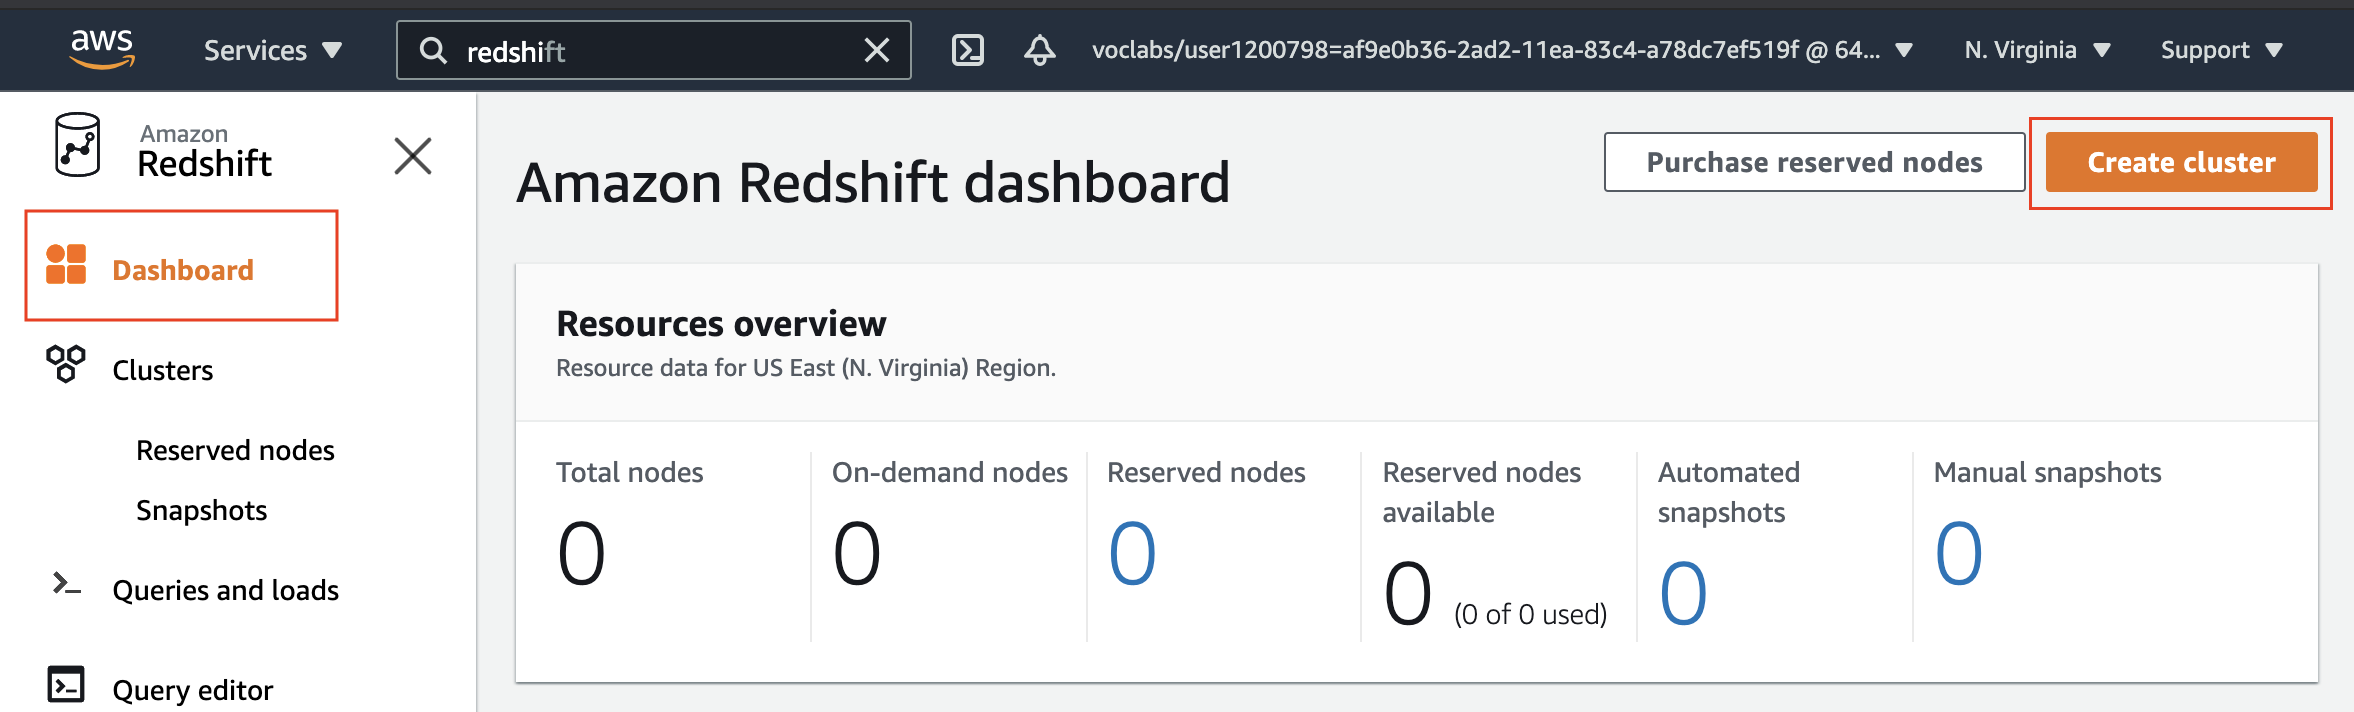
Amazon Redshift dashboard
- Cluster configuration
Provide a unique identifier, such asredshift-cluster-1, and choose the Free trial option. It will automatically, choose the following configuration:
- 1 node of
dc2.largehardware type. It is a high performance with fixed local SSD storage - 2 vCPUs
- 160 GB storage capacity
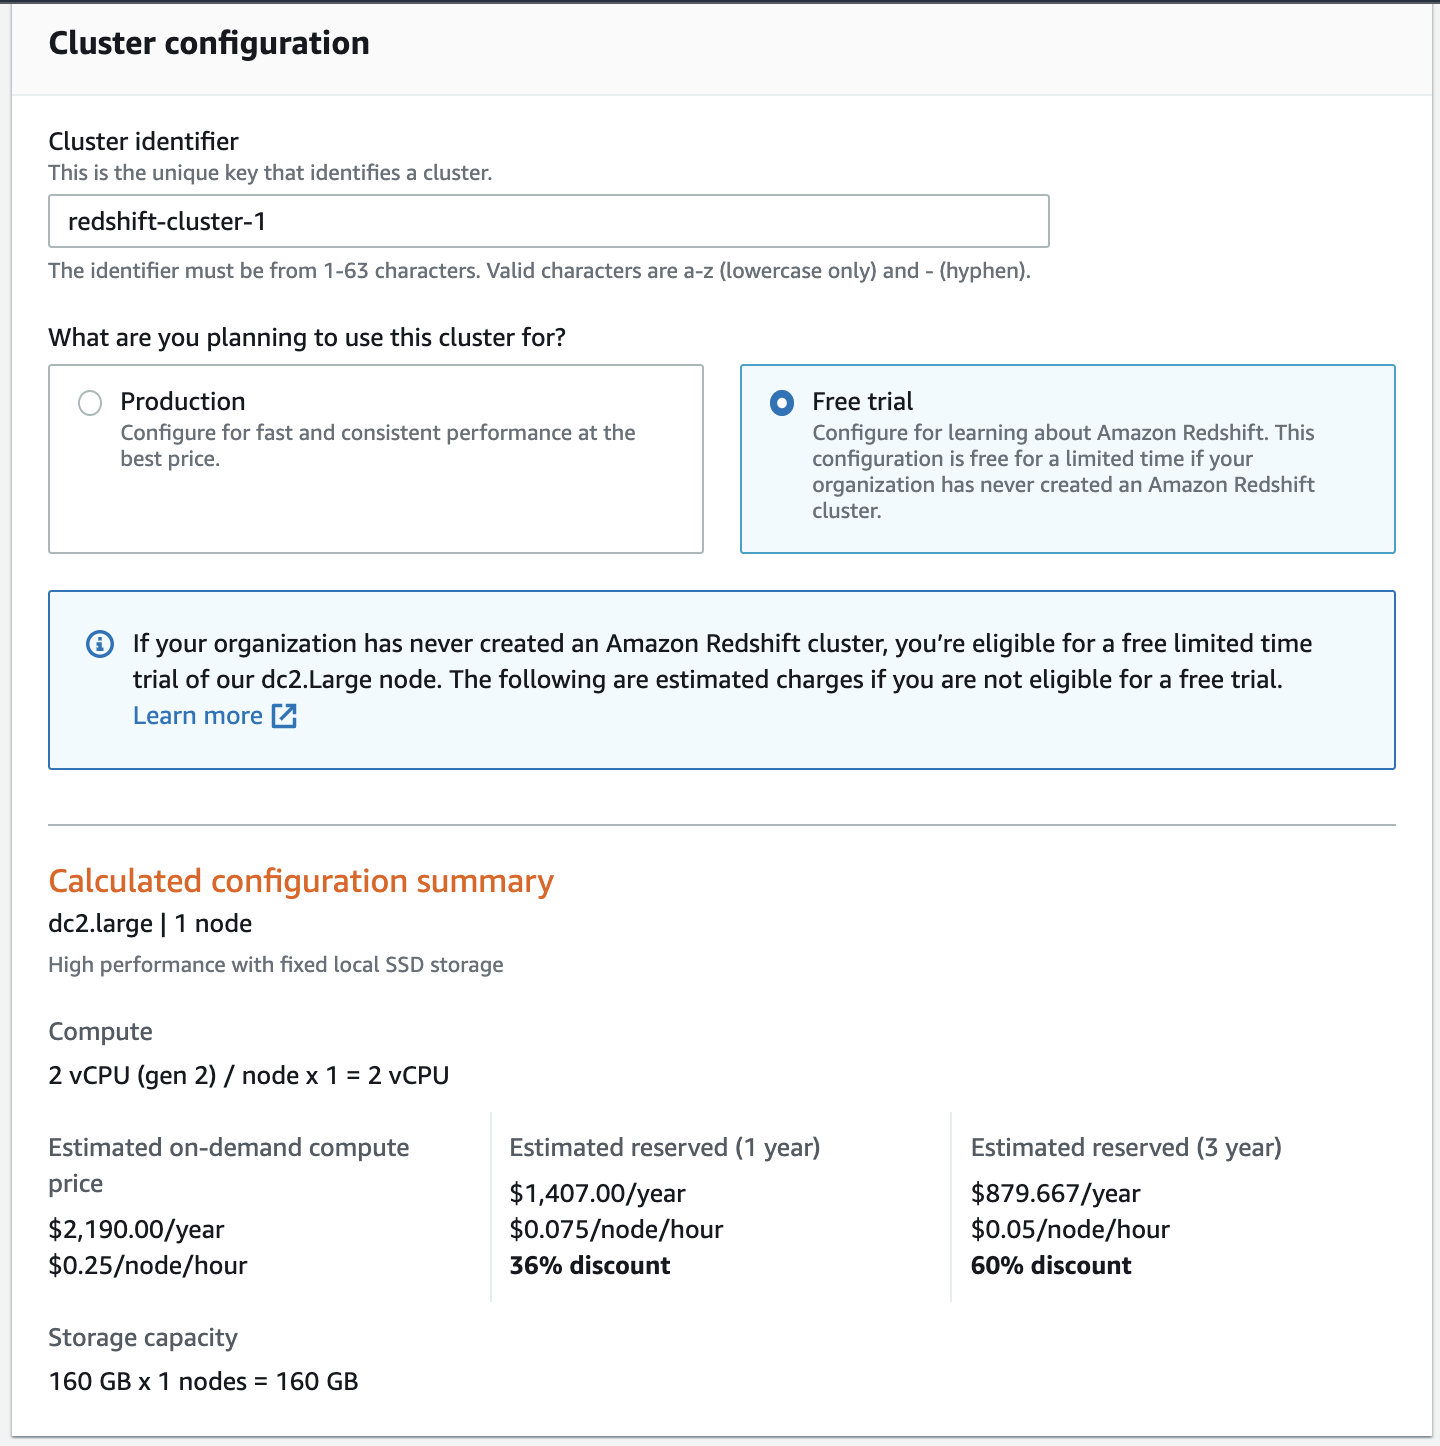
Cluster's basic configuration
- Database configurations
A few fields will be already filled up by default. Ensure to have to the following values:
| Field | Value |
|---|---|
| Database name | dev |
| Database port | 5439 |
| Master user name | awsuser |
| Master user password | Enter a password of your choice |
Please note: We strongly advise you to keep these passwords closely guarded, including not putting them in your GitHub public repo, etc.
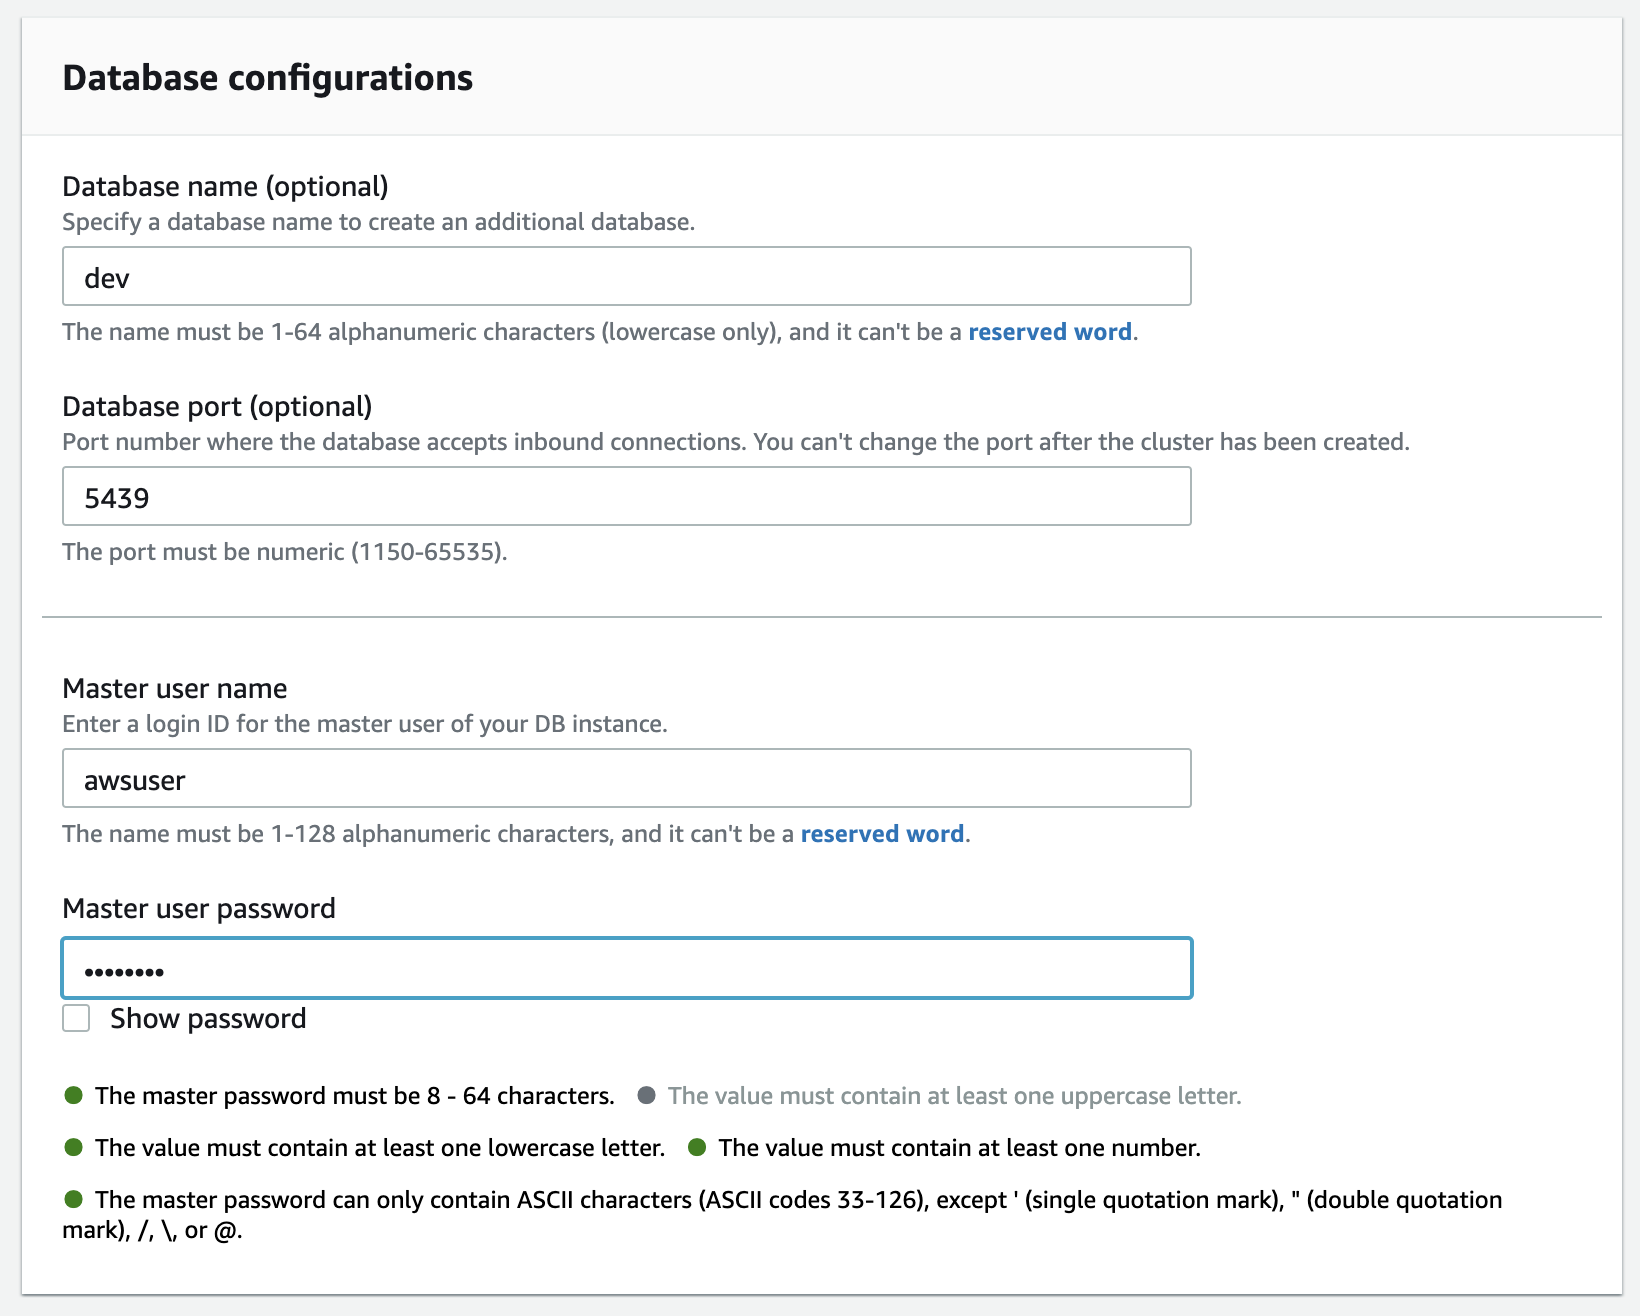
Database configurations
- Cluster permissions (optional)
Choose the IAM role created earlier, myRedshiftRole, from the drop-down and click on the Associate IAM role button.
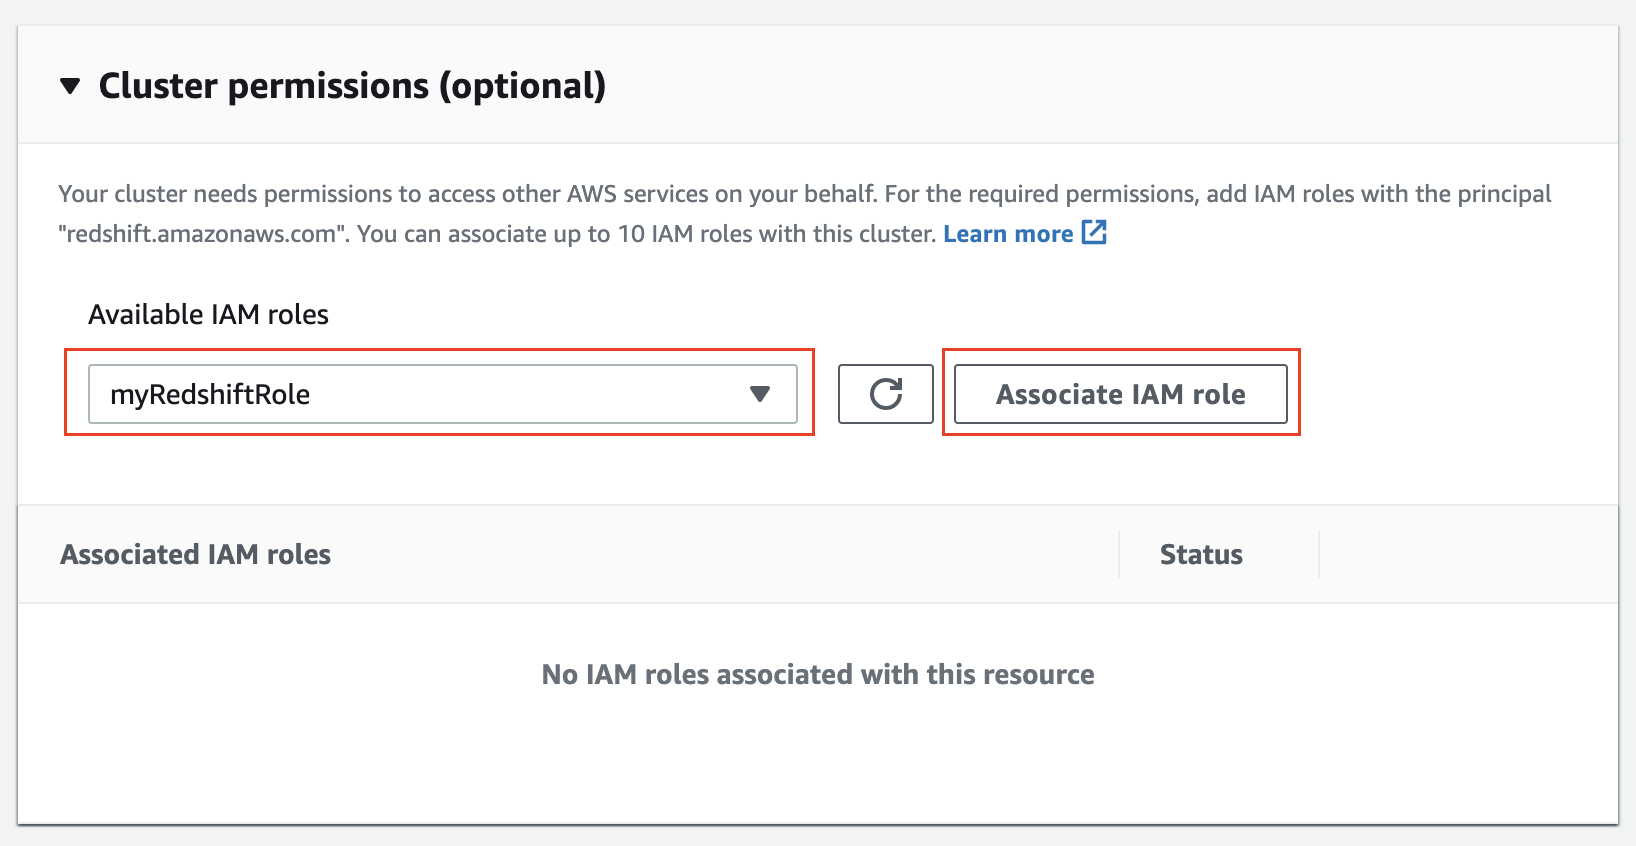
Cluster permissions
Additional configurations
Toggle the button to turn off the "use defaults" feature, and expand the Network and security section. Choose the following values:
| Field | Value |
|---|---|
| Virtual private cloud (VPC) | Default VPC If you are not able to view/select the default VPC, refer to the resolution given here. You will have to create a cluster subnet group. (It's easy, see the snapshots below) |
| VPC security groups | Choose the redshift_security_group created earlier. |
| Cluster subnet group | Choose the default It is the one you have just created. |
| Availability Zone | No preference |
| Enhanced VPC routing | Disabled |
| Publicly accessible | Enable |
| Leave the rest of the values as default. |
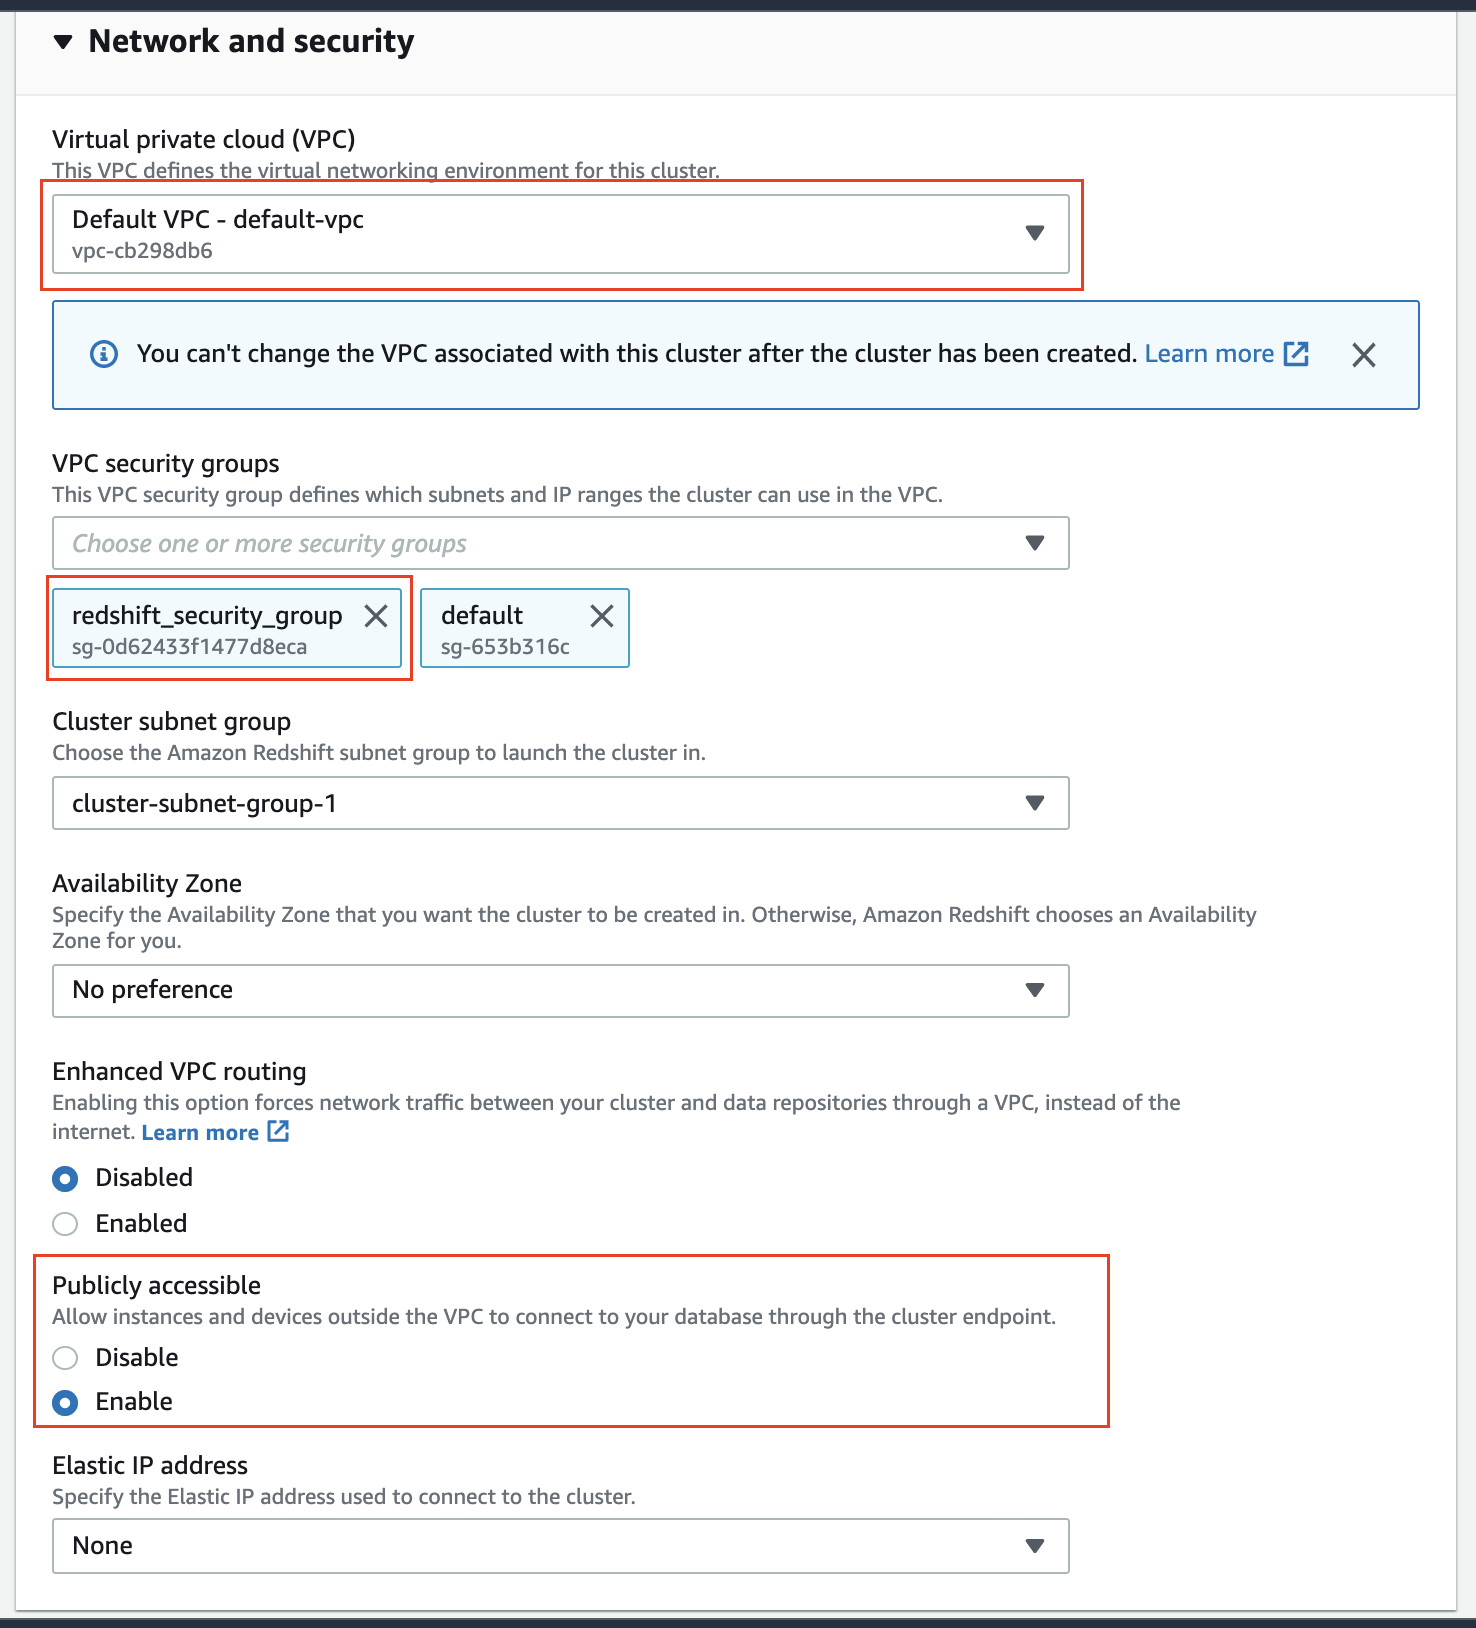
Network and security section
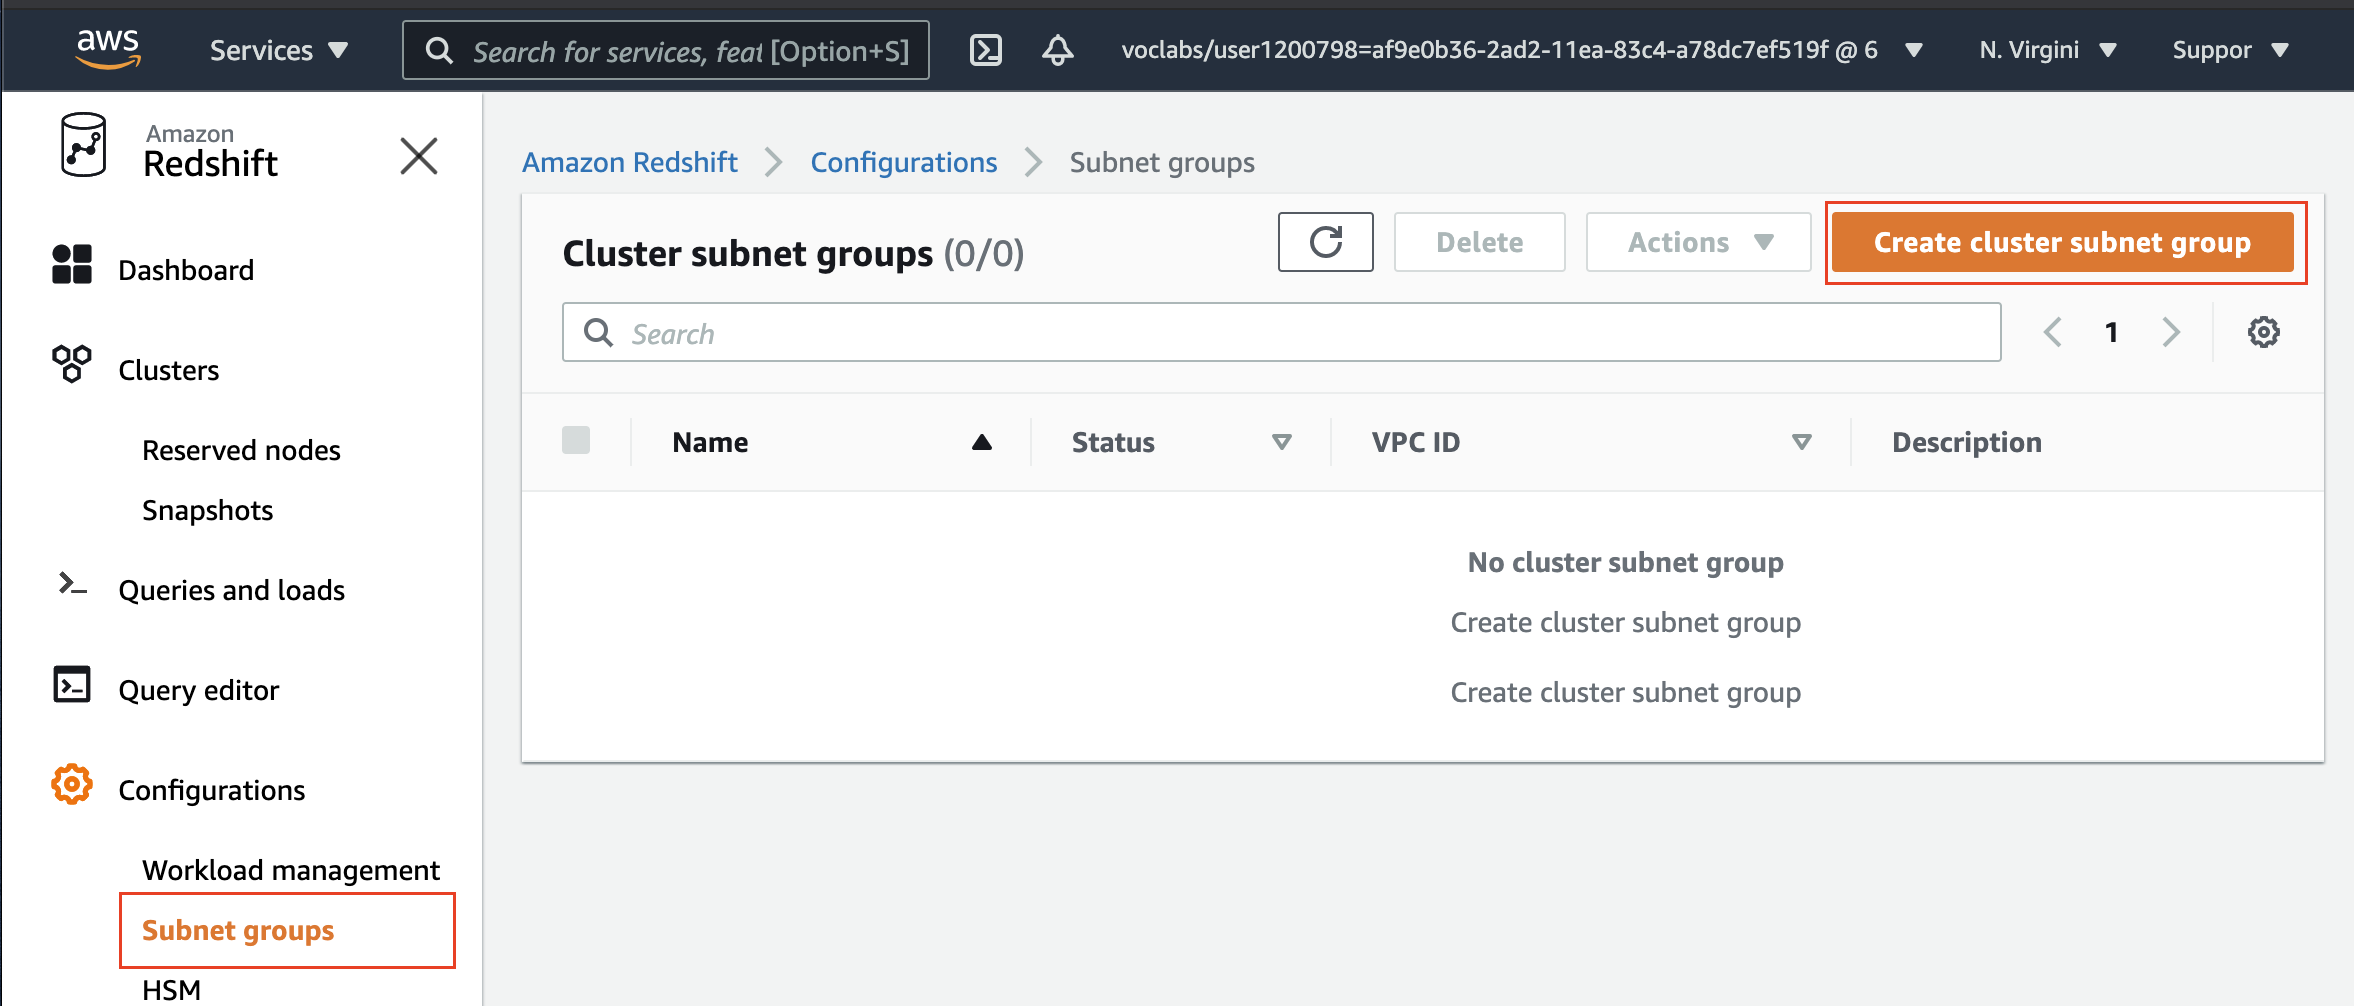
Amazon Redshift → Configurations → Subnet groups
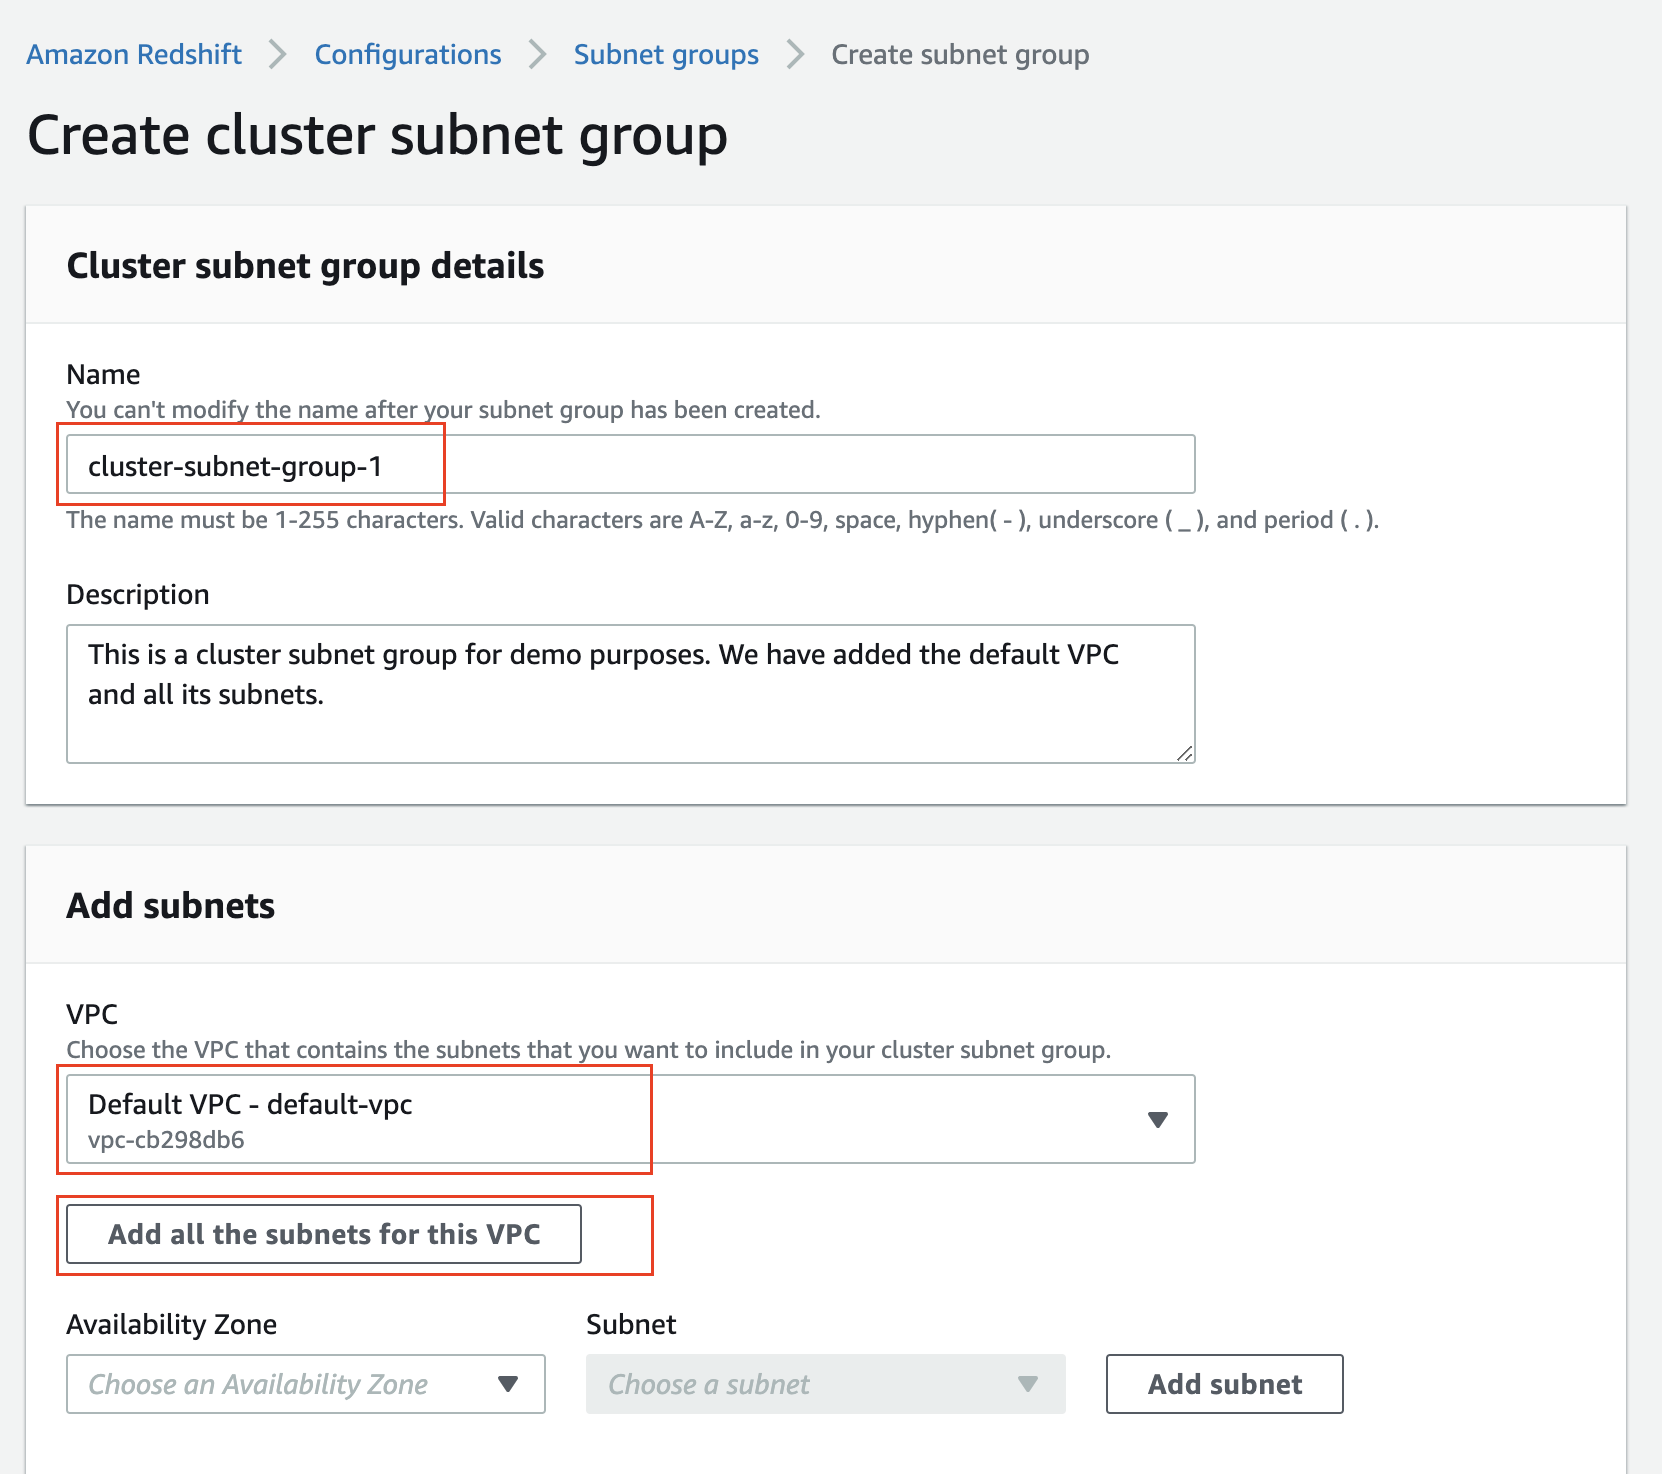
Create a cluster subnet group from a default VPC
- Review your Cluster configuration and click on the Create cluster button at the bottom. It will take a few minutes to finish and show you a Complete status.

Success message/Complete status
- Click on the Clusters menu item from the left navigation pane, and look at the cluster that you just launched. Make sure that the Status is Available before you try to connect to the database later. You can expect this to take 5-10 minutes.
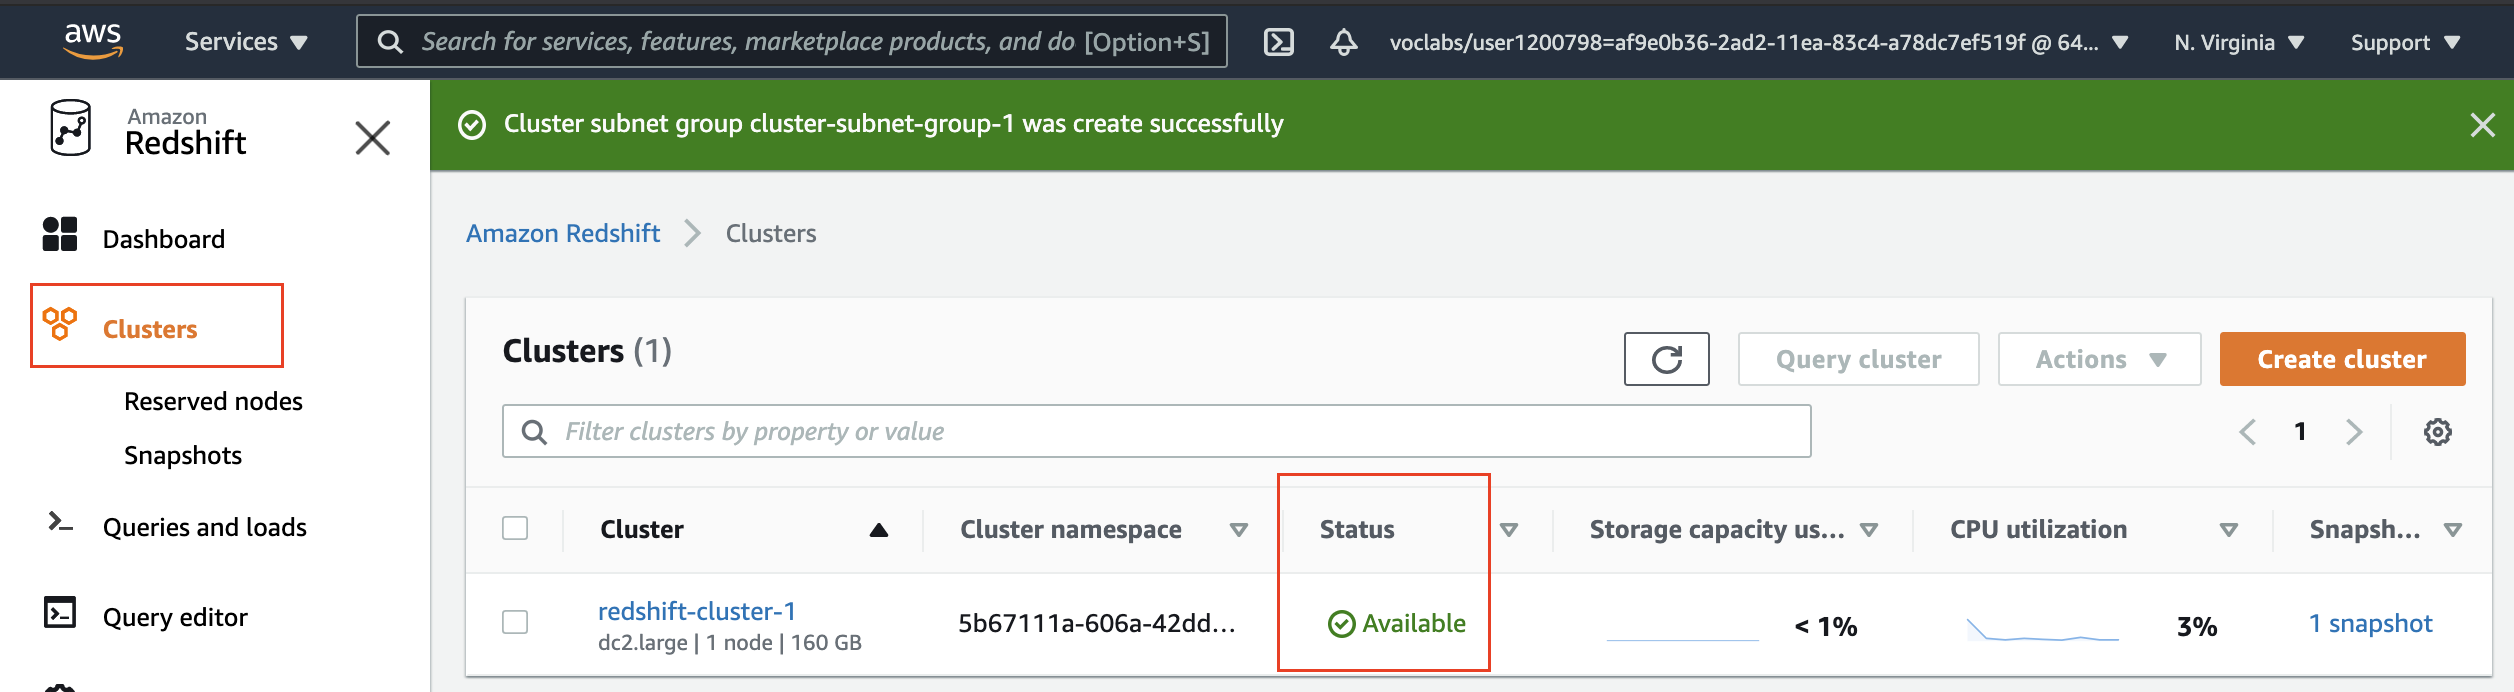
Cluster is ready to be connectedd